
In week five we were tasked with pairing two complementing type faces together with and Image. For this assignment I first created a mood board so I created a new document in Adobe Illustrator by clicking “Command + N” on my keyboard or going up to File and clicking on New in the Drop Down Menu. In the New Document pop up window I just made sure that my profile was set to web and that my width and height were set to 950px by 720px (13″ x 10″).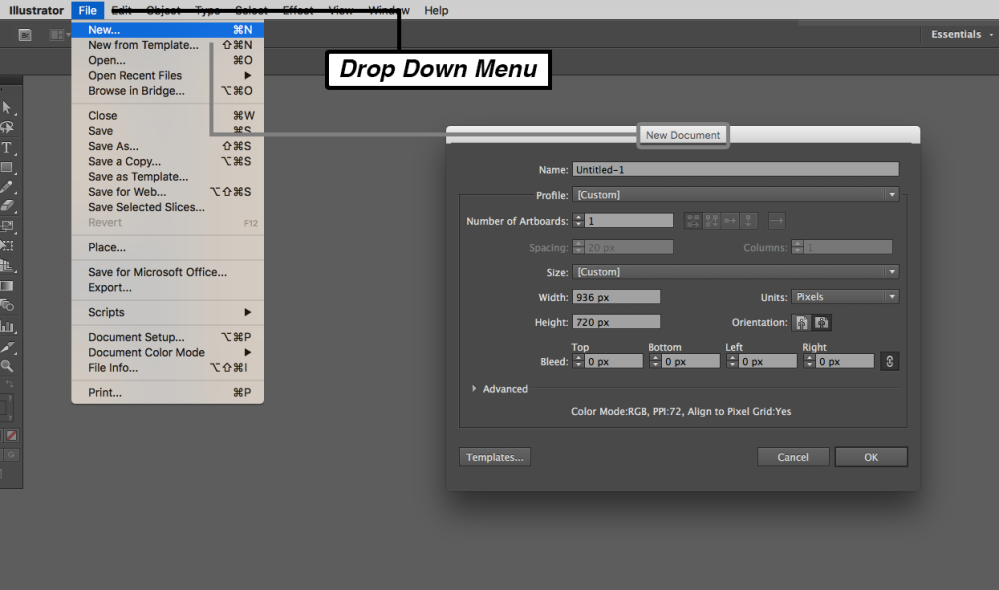 With my new document open the first thing I did was rename the first layer Theme.
 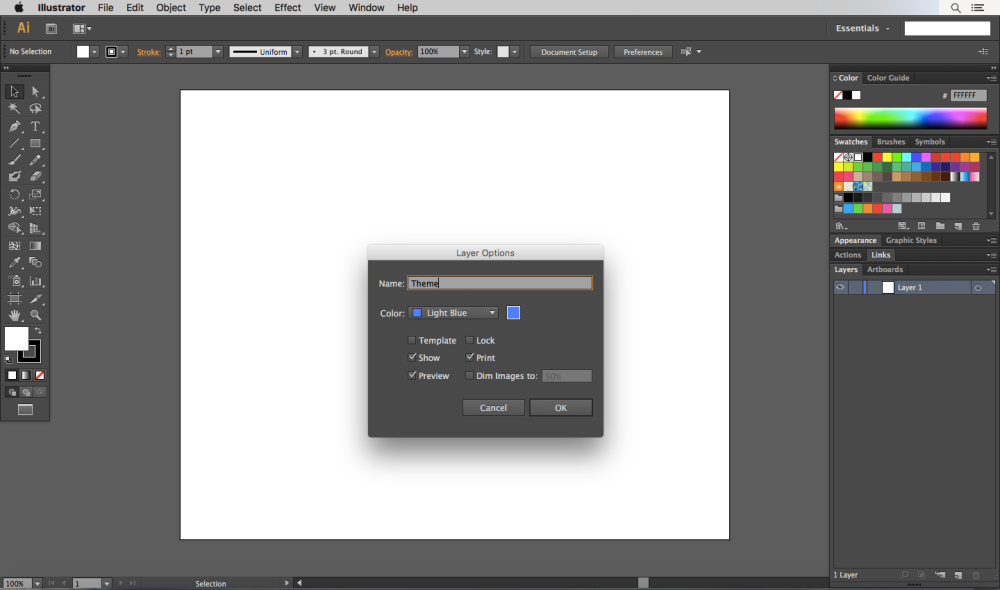 Then using the rectangle tool I created 3 rectangles for my colors, then I used the select to to place an image. then using the text tool wrote down the two fonts I plan on using and I have my Theme board.
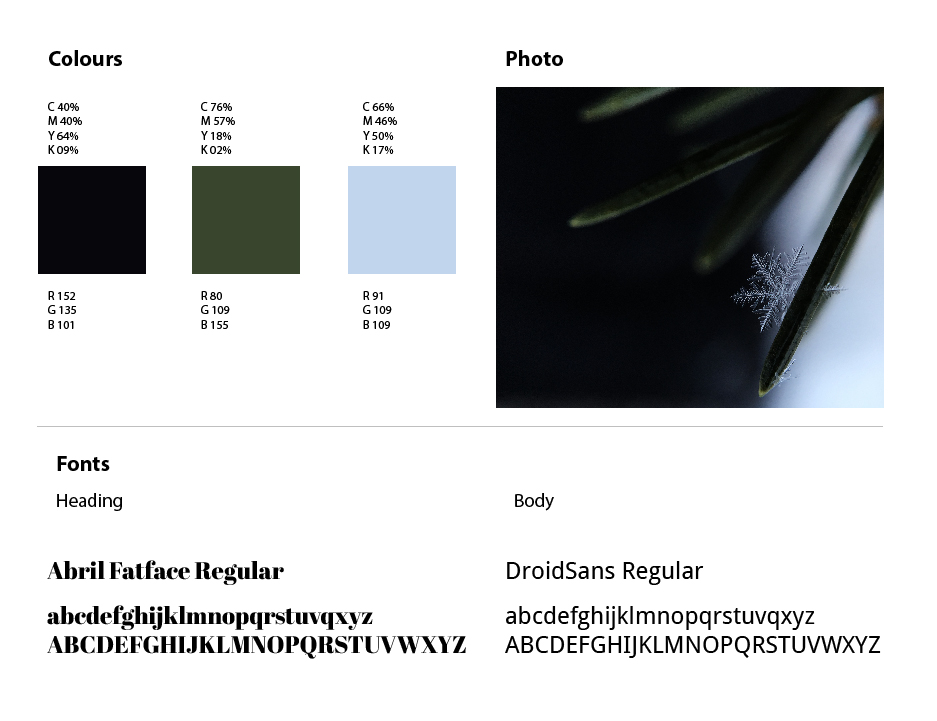 After I finished my theme board I locked and turned the visibility off on my Theme layer with “Shift + Command + N” and created a new layer called Composite.
 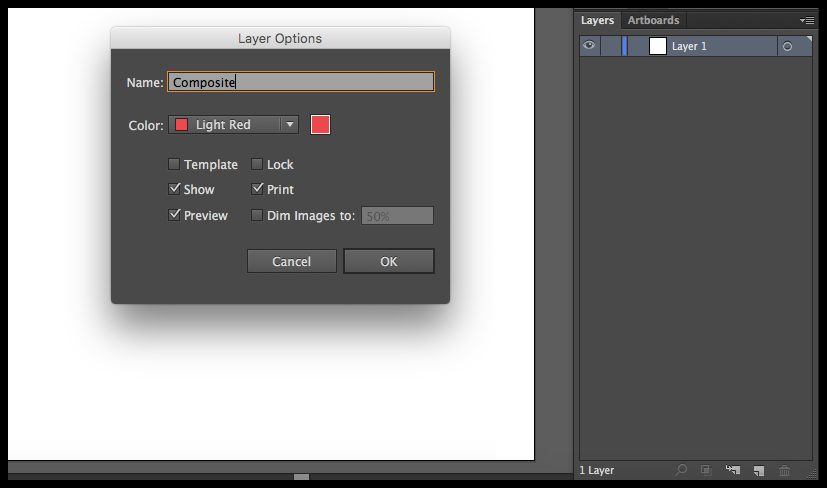 To help me arrange my text with my image I decided to created a custom guide to help me. To do this in Illustrator you must first create a new rectangle with your Rectangle Tool and instead of dragging it out just left mouse click somewhere on your document to get a Rectangle pop up window. This allows you to enter a specific size for your rectangle, and since I want to set my margin to 0.25″ all around my document I will make my dimensions the size of my document and subtract 0.5″ in total. You can enter your calculations into the box and Illustrator will do the math for you, so in my case its 13in-0.5 for the width and 10in-0.5 for the height.
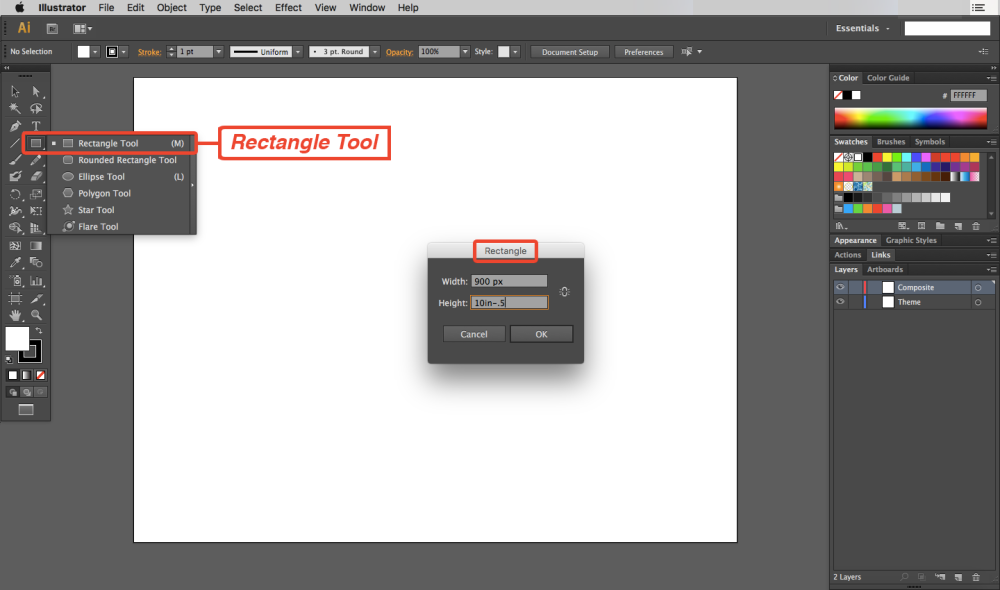 Once you have a rectangle that is the correct size, you want to change the Color to transparent (/) for the fill and black for the stroke. And you will also want to center your box by having your select tool (V) selected and then going up to your Alignment Panel to at the top of your document just bellow the Drop Down Menu. Make sure your alignment is set to “Align to Artboard” in the fly out menu and then click the “vertical center align” and “horizontal center align” buttons.
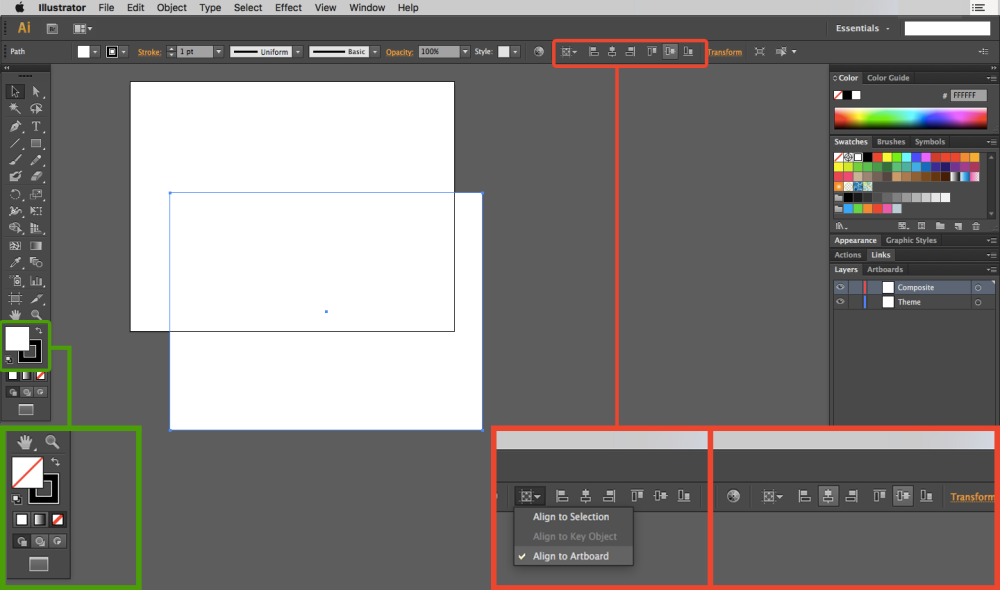 With your rectangle aligned to the center of your document, you will want to divide your rectangle into a grid. So open up Object in you Drop Down Menu and go to Path and click on Split into Grid. You will get a pop up menu that will ask you to specify the number of rows, columns, gutter spacing, and other specifics.
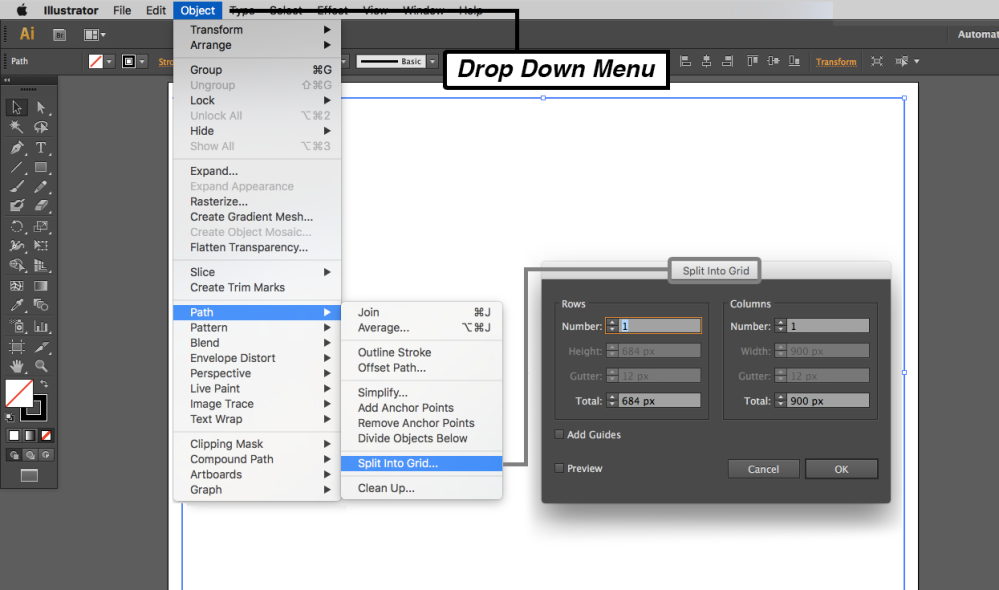 With our rectangle divided into a nice grid, we can turn that Grid into a Guide by opening up View in the Drop Down Menu, going to Guides, and clicking on Make guide.
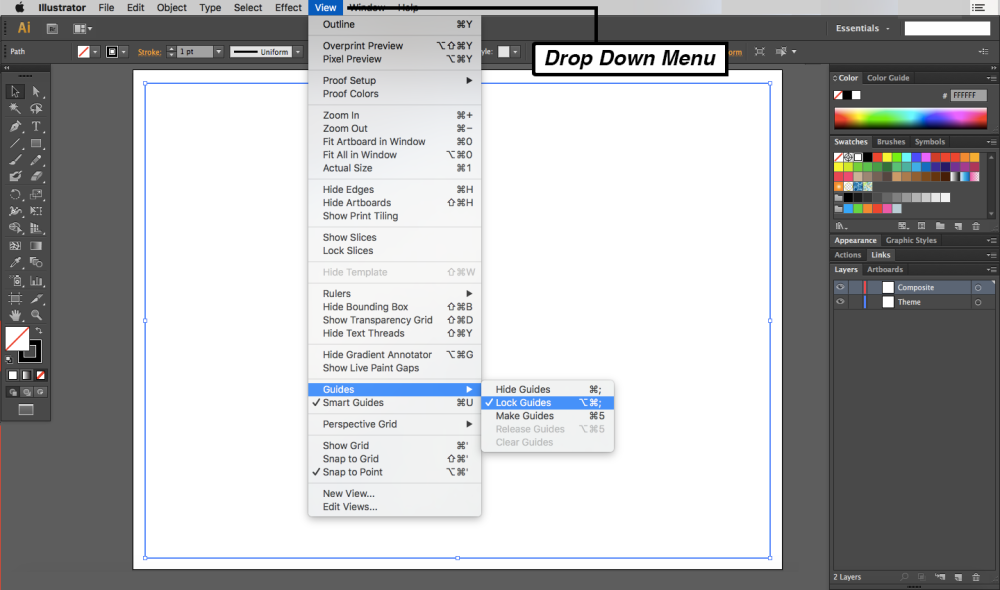 With your guide established, your elements will snap to its edges and you can turn the visibility of your grid on or of by clicking “Command + ;” on your keyboard.
Eventually I ended up with this. And this is the design I ended up with.
Reference:

I like how the snowflake (unique and like no other, yet there are billions of them) speaks to the significance/insignificance theme in the story.
LikeLike